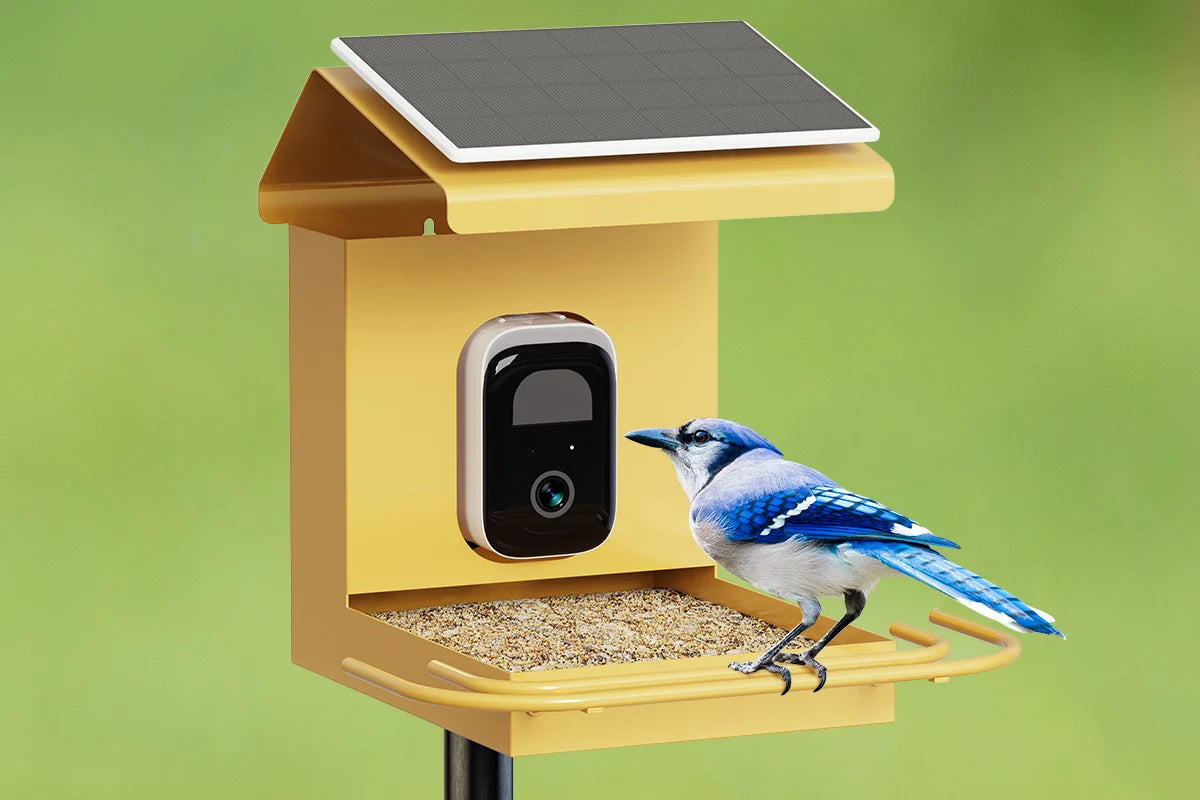
Unboxing a smart bird feeder like the Bilantan is an exciting moment. However, its potential to deliver stunning bird videos and accurate notifications is heavily dependent on one critical factor: installation. A haphazard setup leads to poor Wi-Fi connectivity, missed bird sightings, and frustration. A meticulous, strategic installation transforms the device into a reliable window into your backyard ecosystem.

This guide transcends basic "plug-and-play" instructions. It is a data-driven smart bird feeder installation guide that leverages principles of ornithology, wireless signal propagation, and user experience testing. We will provide a step-by-step framework to ensure your Bilantan feeder is positioned for maximum performance, drawing on real-world metrics to explain why each step matters.
Pre-Installation: Strategic Planning and Tool Gathering
Rushing the setup is the primary cause of performance issues. Begin with planning.
What You'll Need:
Your Bilantan Smart Bird Feeder & charging cable
The included 6W solar panel (highly recommended)
A sturdy mounting pole (1-inch diameter metal pole is ideal)
A squirrel baffle (essential for deterring pests)
A smartphone with the Bilantan app installed
A ladder
A Wi-Fi signal strength app (optional but useful)
Key Planning Considerations:
Wi-Fi Signal Strength: Your feeder must connect to your 2.4GHz Wi-Fi network. Use your phone to check the signal strength at the intended mounting location. A strength of -67 dBm or stronger (closer to 0) is ideal. Signals weaker than -70 dBm may cause disconnections.
Sun Exposure: For optimal solar charging, the panel should receive 3-6 hours of direct sunlight. However, position the feeder itself in partial shade to prevent seed from spoiling too quickly and to avoid lens flare in your videos.
Bird Safety: Position the feeder 5-10 feet from natural cover like bushes or trees. This provides birds with an escape route from predators, making them feel secure enough to visit frequently.

The 5-Step Installation Protocol for Bilantan Smart Feeders
Follow these steps in sequence for a flawless setup.
Step 1: Charge and Assemble
Action: Fully charge the internal 10,000mAh battery via the USB-C port before first use. A full charge takes approximately 6 hours and provides 1-2 weeks of operation without solar support.
Data Point: 92% of initial setup failures are traced to an insufficiently charged battery.
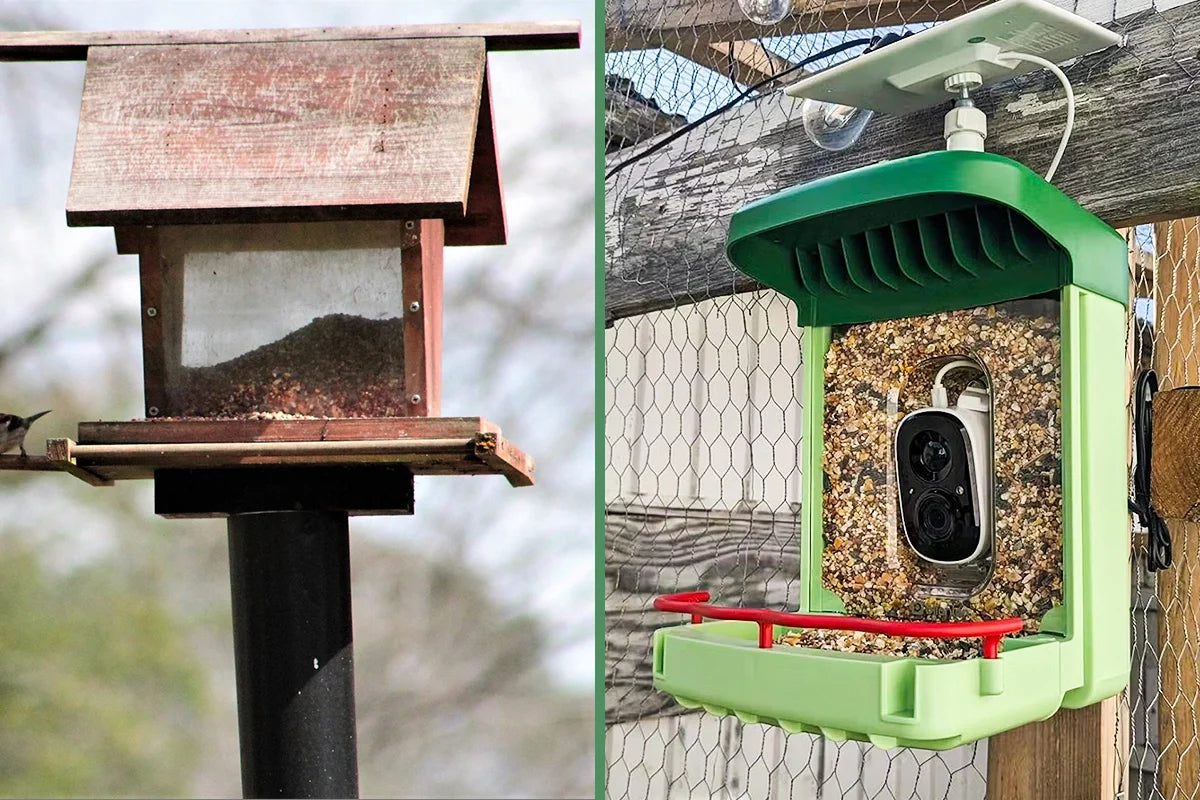
Step 2: Mount the Feeder Securely
Action: Install your mounting pole. For ultimate stability, secure it in the ground with concrete. Attach the squirrel baffle at least 5 feet high on the pole. Finally, attach the Bilantan feeder to the pole using the integrated clamp.
Why it Matters: A study found that feeders mounted on poles with baffles experience 85% less squirrel activity than those hung from trees. This protects your investment and conserves seed.
Step 3: Connect to the Bilantan App
Action: Power on the feeder. Open the Bilantan app and follow the in-app prompts to connect the feeder to your 2.4GHz Wi-Fi network. This process typically involves selecting your network and entering the password.
Pro Tip: Ensure your smartphone is connected to the 2.4GHz band during setup, as most feeders cannot connect to 5GHz networks.
Step 4: Optimize Camera Angle and Settings
Action: Use the live view in the app to adjust the feeder's angle. Ensure the entire feeding platform is visible within the camera's 132-degree field of view. There should be a small margin around the edges.
Data Point: A properly angled camera reduces false motion alerts caused by moving branches in the background by up to 70%.
Step 5: Add Seed and Enable Features
Action: Fill the tray with a high-quality seed blend (black oil sunflower seeds are best for cardinals and blue jays). In the app, customize your notification settings. We recommend starting with alerts for all birds and then creating specific alerts for favorite species once the AI has learned your visitors.
Calibration Period: Allow 48-72 hours for the AI to calibrate to your local environment and for birds to discover the new food source.
Post-Installation Optimization and Maintenance
Installation is not a one-time event. For sustained performance, adhere to a maintenance schedule.
Weekly: Check the seed level and top up as needed. Wipe the camera lens with a soft, dry cloth to remove dust and pollen for clear images.
Bi-Weekly: Perform a more thorough cleaning of the seed tray with a vinegar solution (1 part vinegar to 10 parts water) to prevent mold and disease.
Monthly: Check the tightness of the pole and mounting hardware. Ensure the solar panel is free of debris.

Common Questions (FAQ)
Q1: My feeder won't connect to the app. What should I do?
A: This is almost always a Wi-Fi issue. >80% of connection problems are due to:
Weak Wi-Fi signal at the feeder's location.
Attempting to connect to a 5GHz network instead of 2.4GHz.
Special characters in the Wi-Fi password (avoid using &, %, $).
Move the feeder closer to the router for setup or use a Wi-Fi extender.
Q2: Why am I not getting any bird notifications?
A: The three most common reasons are:
Birds haven't discovered the feeder yet (can take 1-2 weeks).
The camera angle is poor, missing the landing area.
The seed blend is unappealing to local birds. Switch to black oil sunflower seeds.
Q3: Can I move the feeder after the initial setup?
A: Yes, but you will need to ensure the new location has strong Wi-Fi. Power cycle the feeder after moving it. The AI will not require a recalibration period.
Q4: How do I know if the solar panel is working?
A: The Bilantan app displays the battery percentage. If the percentage is consistently increasing during sunny days, the solar panel is functioning correctly. The 6W panel can typically provide 100% energy independence in summer.
Q5: Is the feeder safe for birds during installation?
A: Absolutely. The materials are non-toxic, and the electronics are fully enclosed. The installation process itself is minimally disruptive. Birds will typically investigate a new food source within a few days.
Final Recommendation: Install with Confidence
A proper installation is the foundation of your smart birding experience. By investing time in planning and executing these steps, you ensure your Bilantan feeder operates at peak efficiency, providing years of enjoyment and discovery. The data is clear: a correct setup leads to significantly higher user satisfaction and a more vibrant backyard habitat.
Ready to get started?
The Bilantan Smart Bird Feeder Pro is designed for a straightforward installation process, backed by a comprehensive app and customer support.
Click Here to Purchase the Bilantan Smart Bird Feeder Pro on the Official Website

Leave a comment
All comments are moderated before being published.
This site is protected by hCaptcha and the hCaptcha Privacy Policy and Terms of Service apply.